Note: This blog post contains detail concerning storage and wireless, however, please be aware that inserting hardware or messing with Linux configuration files can cause problems, so exercise Electrostatic Discharge (ESD) precautions and please use your judgement if something looks wrong with the configuration commands below since there may be errors that could cause the system to fail to boot. The information here is written in good faith but please use your own judgement as mentioned.
Adding microSD Storage
The Rockchip Single-Board-Computer (SBC) has 32 Gbytes of built-in embedded Flash memory, and it will quickly fill up, so to prevent that, see the Solving Storage Space Issues Technical Article that explains how a microSD card can be used to help out.
The Axelera kit of goodies contained a Samsung 128 GByte microSD card. To use it, I plugged it in and the typed the following (you might prefer a different mount point compared to what I chose):
sudo mkfs.ext4 -F -L microsd /dev/mmcblk1p1
cd /mnt
sudo mkdir microsd
sudo bash -c "echo \"LABEL=microsd /mnt/microsd ext4 defaults,user,exec,nofail 0 2\" >> /etc/fstab"
sudo mount /mnt/microsd
sudo chown aetina:aetina /mnt/microsd
Now it is possible to store and access files in the /mnt/microsd folder! The Technical Article explains how to create a symbolic link that will effectively offload a cache onto a folder that can be created in the mounted directory.
Adding a 5 GHz Wireless LAN (WLAN)
A 5 GHz-capable WLAN interface isn’t really necessary, but I figured I may as well install it while I was setting up the Linux hardware. I purchased a RTL8822CE M.2 card from Amazon, and using it is not too difficult! I’ve written up the steps here: https://github.com/shabaz123/axelera/tree/main/rtw88
If you have any trouble with the steps, please let me know and I’ll try to help.
Note: Other WLAN cards might be difficult to get running, and may even require a Kernel rebuild or upgrade. The specific card I purchased was listed on Amazon as: Waveshare RTL8822CE Wireless NIC, 2.4G/5GHz Dual-Band WiFi 5, BT5.0, High Speed and Low Latency, RTL8822CE-CG Core, High Speed Wireless Card
Note 2: If you find plugging in antenna connectors onto the WLAN card as difficult as I do, it’s worth watching any YouTube demonstration, or take the WLAN card and antenna cables to a laptop repair store and ask them to do it for you.
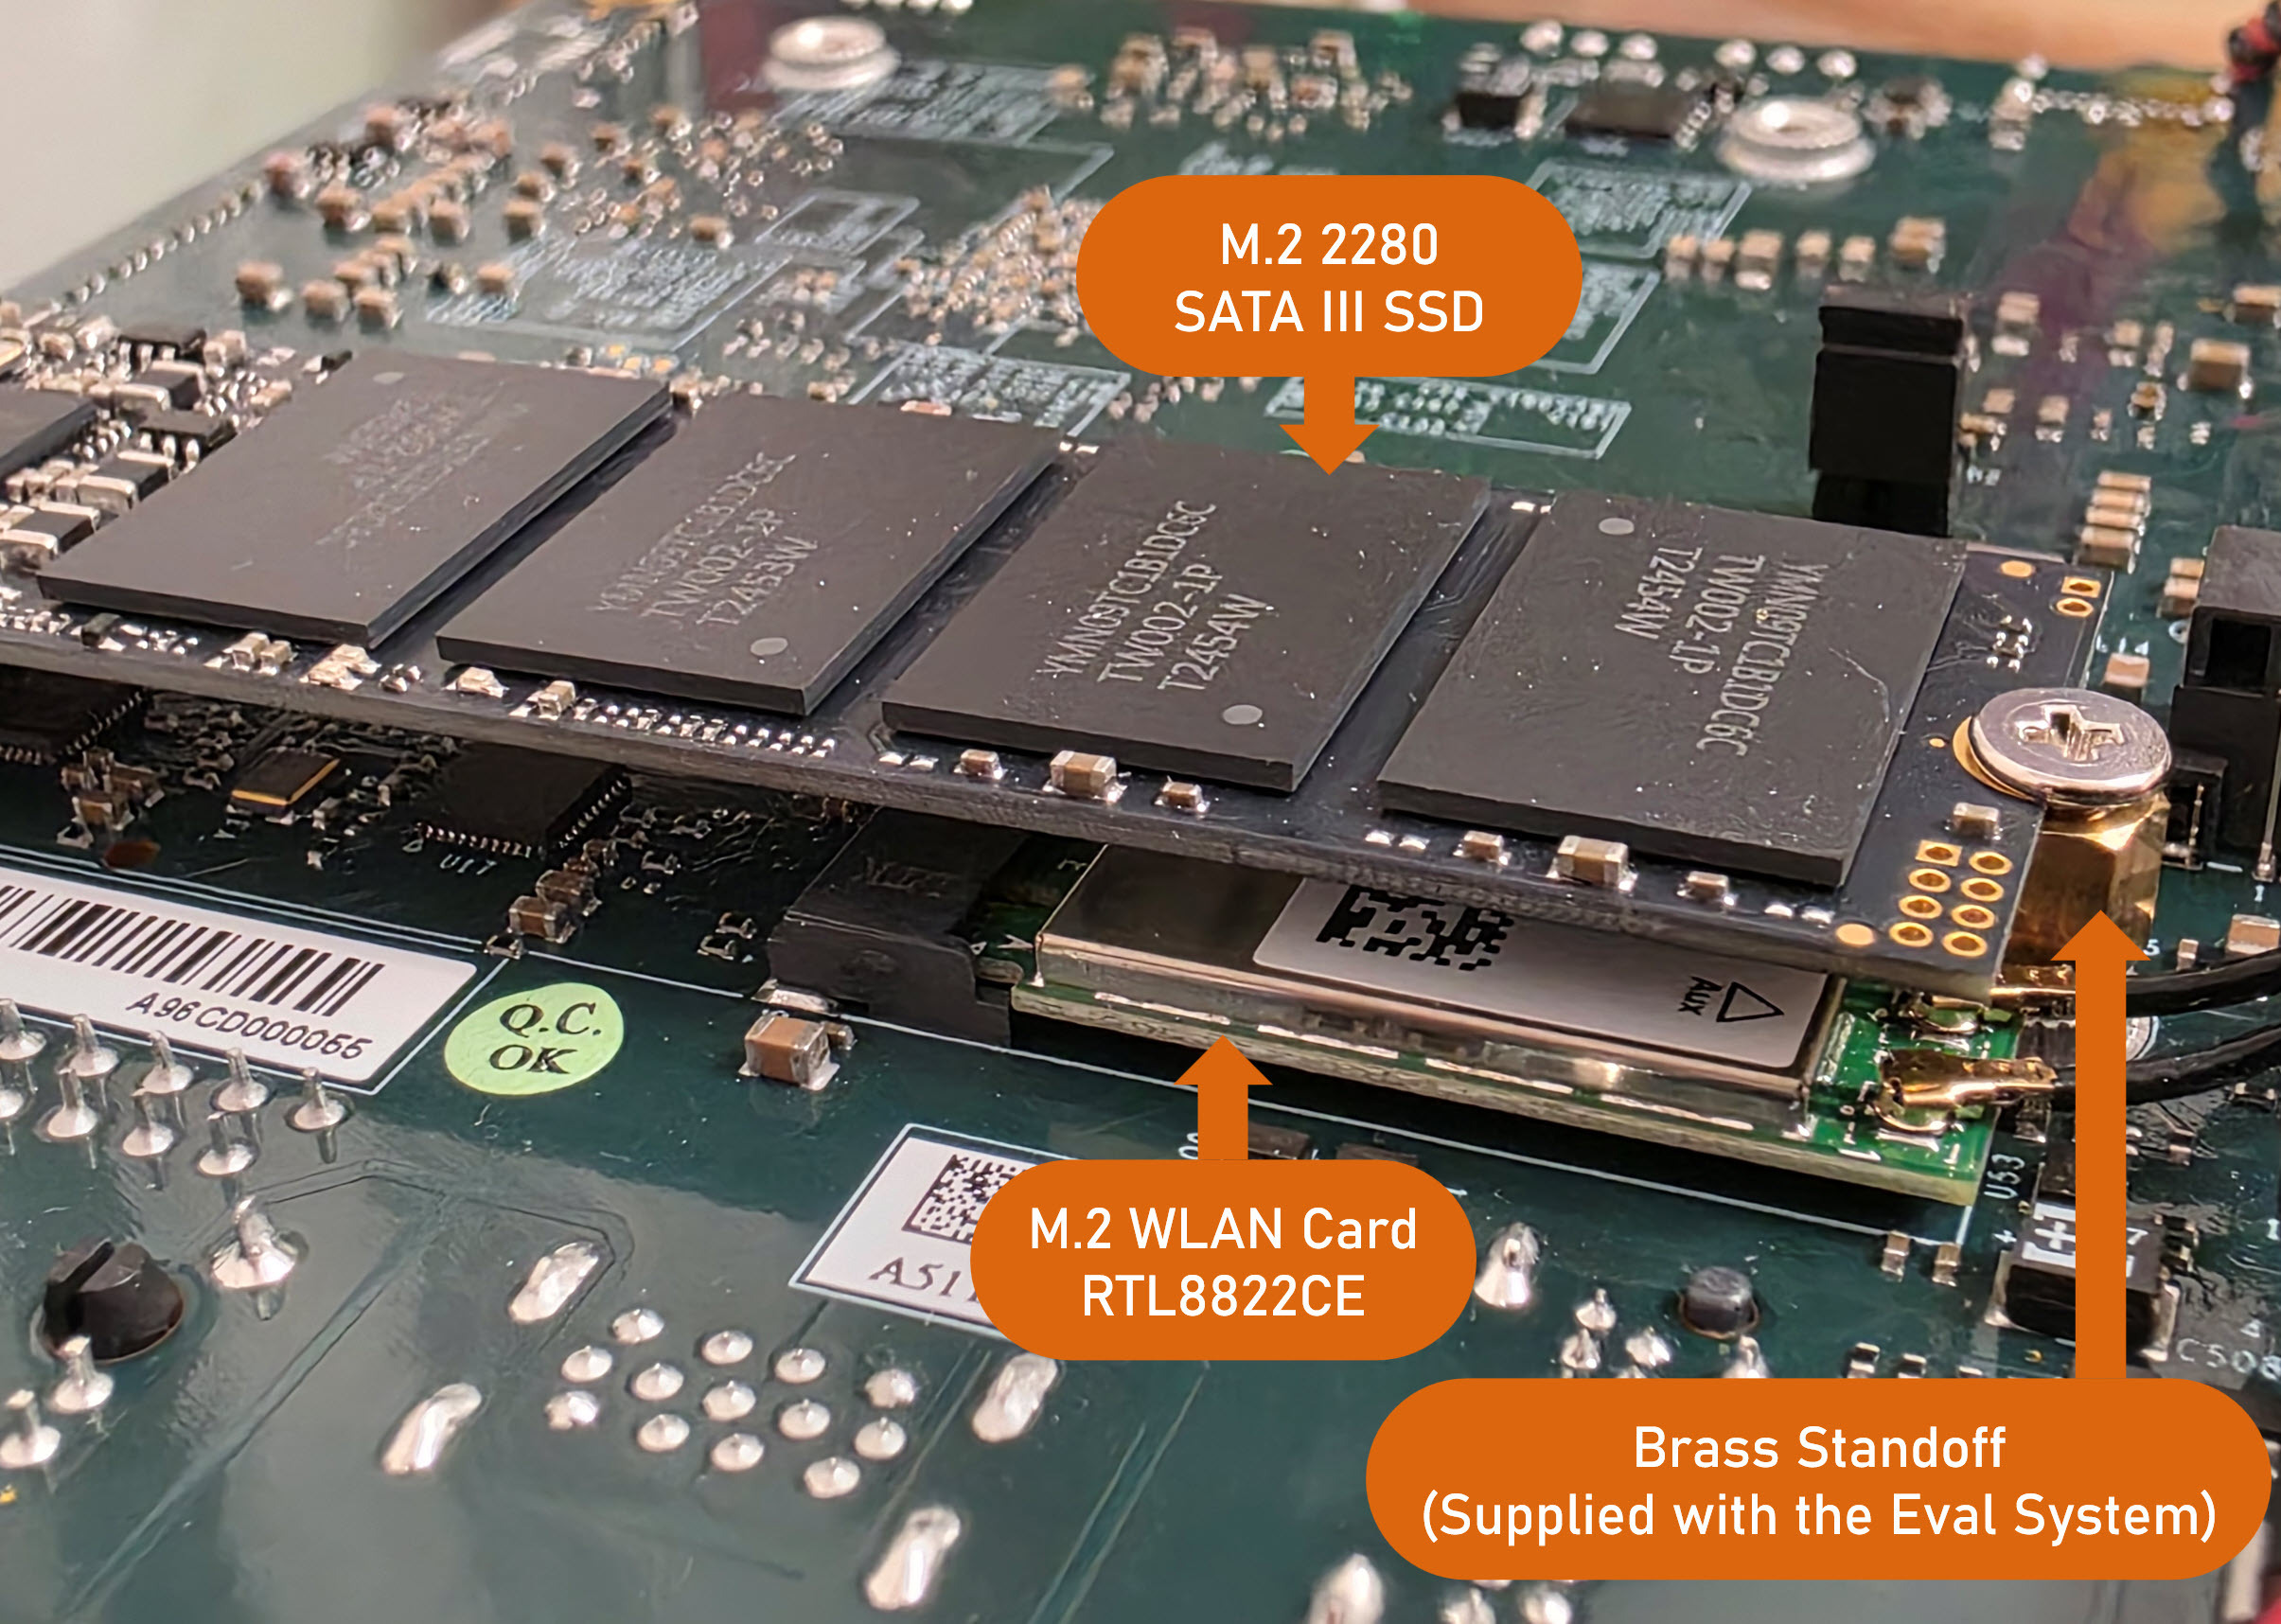
Adding M.2 Solid-State Drive (SSD) Storage
The Axelera M.2 Eval System supports M.2 2280 SATA III SSDs. Note that NVME SSD will not work with the board, it specifically has to be a SATA III SSD. The one I used is an Integral brand model, part code INSSD512GM280.
Powered off and unplugged, I installed the M.2 SSD onto the underside of the board. The SSD will be physically fragile where it is mounted, so you may want to screw some spacers or standoffs onto the Eval System board corners (there are holes for M3 sized screws). I will probably mount the board onto plastic sheet using such standoffs.
After powering up, I typed the following:
sudo apt install fdisk
sudo fdisk -l
You should see your SSD in the output. For instance, I saw:
Disk /dev/sda: 476.94 GiB, 512110190592 bytes, 1000215216 sectors
Disk model: SSD 512G
Next, type:
ls -ald /dev/sda*
You should see a single line appear, such as:
brw-rw---- 1 root disk 8, 0 Jul 8 16:28 /dev/sda
Now type:
sudo parted /dev/sda
mklabel gpt
mkpart primary 0% 100%
quit
ls -ald /dev/sda*
Now you should see two lines appear instead of one:
brw-rw---- 1 root disk 8, 0 Jul 8 16:28 /dev/sda
brw-rw---- 1 root disk 8, 1 Jul 8 16:28 /dev/sda1
Type:
sudo mkfs.ext4 -L m2ssd /dev/sda1
sudo bash -c "echo \"LABEL=m2ssd /mnt/m2ssd ext4 defaults,user,exec,nofail 0 2\" >> /etc/fstab"
You can mount the file system by typing:
cd /mnt
sudo mkdir m2ssd
sudo mount /mnt/m2ssd
chown aetina:aetina /mnt/m2ssd
If you wish to use the SSD for installing the Voyager SDK, then delete the /axelera folder and create a link as follows:
sudo rm -rf /axelera
sudo ln -s /mnt/m2ssd /axelera
Now you can install the SDK, or create a docker folder in /axelera as desired.
Summary
Adding some storage to the Rockchip Single-Board-Computer is very important, it’s best to make use of a microSD card as soon as possible. An M.2 SATA III SSD is easily installed too if desired. While I was at it, I also installed a 5 GHz-capable RTL8822CE Wireless LAN (WLAN) card. All of these steps were straightforward.
This blog post was a little boring since it just focused on storage and wireless, but hopefully I can now focus on more interesting stuff!
Thanks for reading.